Welcome to the first post in a series about the tooling used to build the game Regem Ludos. The game runs in a web browser and does not use a commercial engine, so there are various assorted tools that are cobbled together that constitute the development process. These posts are about those tools.
I'd like to start this off by identifying a problem. A tool, after all, is
something we can use to solve a problem. And that problem is: how do you
define, store, and run a cutscene in a video game? I'm talking about cutscenes
with character art, portraits, animations, and backgrounds. You know, stuff
like this:
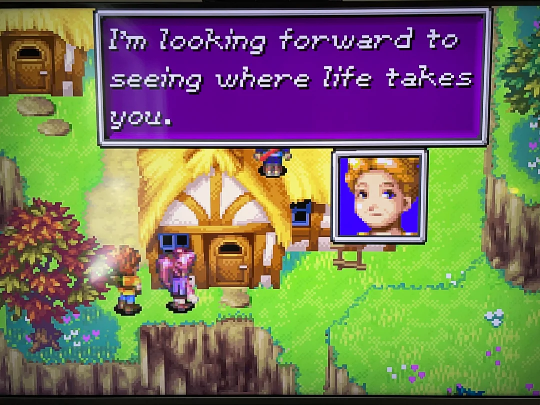
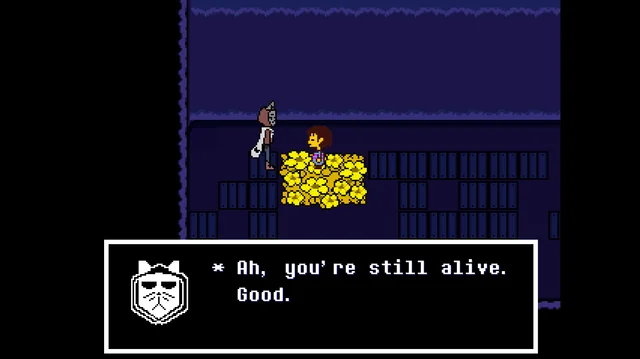
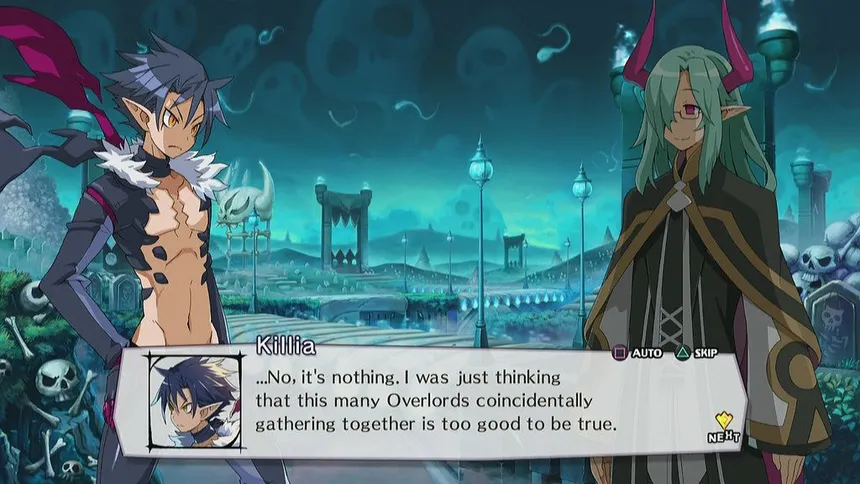
I'll call this an RPG Video Game Cutscene.
- Characters speak one at a time.
- Text is advanced by the player.
- Characters are rendered which represent who is in the scene and talking.
- Characters in the scene can act and emote.
- The scene can modify the game: set variables, move actors, ask questions of the player... etc.
Let's take a journey through the creation of Rpgscript and the cutscene engine for Regem Ludos.
A Cutscene's Script
A script for a play or a movie is written in the simplest manner possible: a
list of dialogue lines and instructions that the actors read and follow until
the end. For the sake of a persistent example, here's an edited snippet of a
query to Gemini 2.5 Flash for a simple scene:
Can you write me an example script for a scene in a play where a student
picks up a pencil for a girl?
  [SCENE START]

  INT. CLASSROOM - DAY

  SOUND of chatter

  A typical classroom. Desks, chairs, a
  whiteboard. Some students are still
  milling about, others are already
  seated. CHLOE (16, bright, a little
  shy) is at her desk, rummaging through
  her bag, a slight frown on her face.
  Across the aisle, LIAM (16, amiable, a
  bit clumsy) is looking wistfully out
  the classroom window.

  Chloe sighs, pulling out a handful of
  crumpled papers. Her pencil case is
  nowhere to be found. She checks her
  desk one last time, then looks under
  it.

  CHLOE
  I wish I had a pencil right now...

  Suddenly, a pencil rolls out from
  under Liam's desk and stops near
  Chloe's foot. It's a bright yellow
  pencil with a worn eraser.

  CHLOE
  Huh, what's that?

  Liam notices Chloe looking at the
  pencil.

  LIAM
  (Smiling weakly)
  Oops. That's probably mine. Happens a
  lot. My desk is basically a basket of
  stationery.

  Chloe giggles softly.

  CHLOE
  No worries.

  She reaches down to pick it up, but
  Liam is quicker. He leans over, scoops
  up the pencil, and holds it out to her.

  LIAM
  Want it? Here you go.

  Chloe takes it, their fingers brushing
  for a fleeting moment.

  CHLOE
  Thanks.

  Chloe blushes and quickly looks away.

  LIAM
  Anyway, I guess I'll see you around.

  CHLOE
  Right.
Thanks Gemini 👍, that's quite saucy, and... descriptive. But also perfectly generic.
What we have here is the following:
- [Bracketed] text indicating scene control.
- Character's lines are declared after their name in ALL CAPS
- Descriptive text sets the scene and declares action.
Let's discuss how to turn this into code.
Step 1: Dialogue
I first want to know how to make this: Line by line the scene progresses where the characters speak to each other; each line is advanced by the player pressing a button. Let's ignore all actors and art for now, and simply think of the text. Like a book. We'll call this a 'dialogue'.
Taking Gemini's script from above, here are the lines the characters are speaking:
Chloe: "I wish I had a pencil right now..."
Chloe: "Huh, what's that?"
Liam: "Oops. That's probably mine. Happens a lot. My desk is basically a
basket of stationery."
Chloe: "No worries."
Liam: "Want it? Here you go."
Chloe: "Thanks."
Liam: "Anyway, I guess I'll see you around."
Chloe: "Right."
Here's an example of a program that executes this dialogue: (direct link and source code)
Relevant code snippet
let lineIndex = 0;
const lines = [
  `Chloe: "I wish I had a pencil right now..."`,
  `Chloe: "Huh, what's that?"`,
  `Liam: "Oops. That's probably mine. Happens a lot. My desk is basically a basket of stationery."`,
  `Chloe: "No worries."`,
  `Liam: "Want it? Here you go."`,
  `Chloe: "Thanks."`,
  `Liam: "Anyway, I better get back to my desk."`,
  `Chloe: "Right."`,
];
This accomplishes the first goal: a dialogue that runs line by line. Data is stored in a simple string array, and an index is used to track which line is currently being displayed. All the writer needs to know to create a scene is how to make this array in code. The exact implementation of the rendering of the text does not matter to the writer.
An approach like this works for text-only games where there's no action, but that isn't the goal of this journey. It is merely the first step!
Step 2: Actors As Puppets
In an RPG Video Game Cutscene, there are no actors. Instead, I'd argue that you have puppets which can be controlled via code. The little bits of descriptive action and small indicators of emotion that actors would usually perform for you during the scene now have to be entirely defined by the writer.
There's an obvious limitation to puppets, in that their actions are restricted to the ways in which you can manipulate them: be that strings, gloves, poles, levers, and in the case of a game, the engine. But even with the simplest of manipulators, you can evoke a lot of action from these on-screen props.
For the second example, I'd like to demonstrate that even the simplest of figures with the most basic of movement dramatically contributes to the scene. I've appropriated an svg of a person from game-icons.net. Chloe is the pink one on the left, Liam is the blue one on the right. By allowing these puppets to move around just a bit, the scene starts to become much more alive. (direct link and source code)
Relevant code snippet
let lineIndex = 0;
let lineIndex = 0;
const lines = [
    {
      text: 'Chloe: "I wish I had a pencil right now..."',
      cmd: () => shakePuppet('chloe'),
    },
    {
      text: 'Chloe: "Huh, what\'s that?"',
      cmd: () => movePuppet('chloe', 2, 0),
    },
    {
      text: 'Liam: "Oops. That\'s probably mine. Happens a lot. My desk is basically a basket of stationery."',
      cmd: () => movePuppet('liam', -10, 0),
    },
    {
      text: 'Chloe: "No worries."',
      cmd: () => shakePuppet('chloe')
    },
    {
      text: 'Liam: "Want it? Here you go."',
      cmd: () => movePuppet('liam', -10, 0),
    },
    {
      text: 'Chloe: "Thanks."',
      cmd: () => movePuppet('chloe', 5, 0)
    },
    {
      text: 'Liam: "Anyway, I better get back to my desk."',
      cmd: () => movePuppet('liam', 15, 0),
    },
    {
      text: 'Chloe: "Right."',
      cmd: () => shakePuppet('chloe')
    },
];
...

const shakePuppet = (puppetName) => {
  ...
};

const movePuppet = (puppetName, x, y) => {
  ...
};
Instead of storing each line by itself in an array, the example expands to JSON objects that include a command (cmd). This controls what the puppet does at the same time the text is shown. For now, the puppet has some limited actions as provided by the engine: "shakePuppet" and "movePuppet". These represent the levers a writer has to control the puppets. Using just those two functions in various combinations there is an obvious positive effect to the scene! That's pretty cool.
With this version, the writer now has more levers that can be used to depict a scene. They don't need to care about exactly how shakePuppet or movePuppet is implemented in the code. They only need to know that they exist, and perhaps the nuances they have. Things like: if I tell it to move -15 in the x direction, how far is that, exactly? This can be learned with a bit of use in the engine.
It should be noted that adding these explicit commands increases the overhead writers need to know to write a scene. In addition to the syntax of an array of json objects, they need to know what functions are available to them, and what puppets in the scene can be manipulated. This is part of the cost of writing a game, versus writing a play.
Even so, the current implementation is still really limited. The action of each puppet is tied to the dialogue line, actions can only happen right when the text for dialogue is displayed. But real actors and puppets can move and act without saying anything. They do it all the time! What if we want to indicate an expression? Or show Liam actually picking up the pencil? And the pencil... Where's that in the scene? This needs to go further.
Step 3: Automation and Synchronousness
Up until this point, the player has been the one controlling the progression of the scene by means of the "click to continue" button. The scene only progresses if and when the player clicks the button. But that's not how a real scene works. Actors can express emotion, move, and interact with each other all at the same time, without any dialogue having been spoken. The rigidity of this current system does not support this, and that is a problem.
It is now necessary for some automation, and to accomplish that, a simulation. If you're writing a game, chances are you already have some semblance of a simulation happening: a game loop advancing over some time period that updates and draws the world. The time has come to leverage that.
A complication of this addition is that now each action has an additional dimension of data that it needs to store: the time it takes for an action to complete. The basic cutscene has not changed: it is still a list of actions and dialogue that happen in sequence, but now instead of using an index to track the progression of the scene, we need to use time. Timers in code can get a bit complicated...
Bear with me here. We are approaching the point where a concise and easy to understand example is difficult to show. In the next demonstration the engine has been expanded with a simulation, and a few more levers are available to the writer, allowing control of puppets over time in addition to letting the player advance dialogue. Once again, I've taken an svg from game-icons.net and added a pencil to the scene. (direct link and source code)
Relevant code snippet
const lines = [
  {
    cmd: 'shakePuppet',
    args: ['chloe'],
  },
  {
    cmd: 'playDialogue',
    args: ['Chloe: "I wish I had a pencil right now..."'],
  },
  {
    cmd: 'movePuppet',
    args: ['pencil', -15, 0, 'ease-out', 750],
  },
  {
    cmd: 'waitMs',
    args: [500],
  },
  {
    cmd: 'movePuppet',
    args: ['chloe', 5, 0],
  },
  {
    cmd: 'playDialogue',
    args: ['Chloe: "Huh, what\'s that?"'],
  },
  {
    cmd: 'movePuppet',
    args: ['liam', -5, 0],
  },
  {
    cmd: 'playDialogue',
    args: [ 'Liam: "Oops. That\'s probably mine. Happens a lot. My desk is basically a basket of stationery."' ],
  },
  {
    cmd: 'shakePuppet',
    args: ['chloe'],
  },
  {
    cmd: 'playDialogue',
    args: ['Chloe: "No worries."']
  },
  {
    cmd: 'movePuppet',
    args: ['liam', -10, 0],
  },
  {
    cmd: 'movePuppet',
    args: ['pencil', 0, -25],
  },
  {
    cmd: 'playDialogue',
    args: ['Liam: "Want it? Here you go."'],
  },
  {
    cmd: 'movePuppet',
    args: ['liam', -10, 0, 'linear', 200, true],
  },
  {
    cmd: 'movePuppet',
    args: ['pencil', -15, 0, 'linear', 200, true],
  },
  {
    cmd: 'movePuppet',
    args: ['chloe', 10, 0, 'linear', 200],
  },
  {
    cmd: 'waitMs',
    args: [200],
  },
  {
    cmd: 'movePuppet',
    args: ['liam', 10, 0],
  },
  {
    cmd: 'shakePuppet',
    args: ['chloe'],
  },
  {
    cmd: 'playDialogue',
    args: ['Chloe: "Thanks."'],
  },
  {
    cmd: 'movePuppet',
    args: ['liam', 10, 0],
  },
  {
    cmd: 'shakePuppet',
    args: ['liam'],
  },
  {
    cmd: 'playDialogue',
    args: ['Liam: "Anyway, I guess I\'ll see you around."'],
  },
  {
    cmd: 'shakePuppet',
    args: ['chloe'],
  },
  {
    cmd: 'playDialogue',
    args: ['Chloe: "Right."'],
  },
  {
    cmd: 'movePuppet',
    args: ['chloe', -5, 0, 'linear', 200, true],
  },
  {
    cmd: 'movePuppet',
    args: ['pencil', -10, 0],
  },
];

...

const playDialogue = (text) => {
  ...
};

const waitMs = (ms) => {
  ...
};

const shakePuppet = (puppetName, ms = 150, skipWait = false) => {
  ...
};

const movePuppet = (
  puppetName,
  x,
  y,
  ease = 'linear',
  ms = 75,
  skipWait = false
) => {
  ...
};
Gosh... that's a big difference! Maybe let's take these changes one by one.
The data is now stored differently, in a more generic way. Instead of biasing the data towards always having a line of text, the script is now represented as a sequence of command blocks, and these are stored as the name of a function and the arguments to that function. This makes it so the engine doesn't need to distinguish between "dialogue" commands and any other command, and it can treat them all as the same. With this change, each command to a puppet can now indicate whether or not it should be advanced by the player or advanced after a period of time, and the engine takes care of the details.
In the same vein, two new additional puppet commands have been added: "playDialogue", which perhaps obviously renders text, and "waitMs", which does nothing except instruct the system to pause for some number of milliseconds. As referenced before, every command now has some time component to it, and they execute over that period before finishing. The command "playDialogue" waits for the time it takes the player to click continue. Every other command waits a specified number of milliseconds before continuing.
It should be noted that now "movePuppet" and "shakePuppet" have an additional parameter called "skipWait". When the engine executes one of these command blocks it does so until the specified ms for the block is complete, then it moves on to the next block. The "skipWait" parameter instructs the engine NOT to wait. The command will still execute over its specified number of milliseconds, but the engine will immediately execute the next command block. This allows a writer to have puppets do things at the same time: For example, moving the pencil, Liam, and Chloe puppets simultaneously.
Okay, now we're getting somewhere with this. We've almost emulated the original scene as it is written. But the way you actually write this is really quite cumbersome. You have to create it all in JSON syntax, which doesn't look like the original script at all, and you have to ensure the code is formatted neatly and correctly so that you can easily make changes. It balloons the size of this simple scene quite a lot, it introduces complexity that you just don't want to worry about when you're creatively writing. And if you show this to somebody who isn't familiar with it, like a voice actor, editor, or a translator, they will have a hard time understanding what's going on.
Step 4: Syntactical Advantage
At this point we have a reasonable method of storing a cutscene in code, but I'd say it's not a reasonable method of storing it to read or write. I now want some way of writing these lists of command blocks in a way that writers are used to writing and actors are used to reading. In other words, a way that resembles the original script. This is where the syntax for Rpgscript is useful and the start of the problem that Rpgscript solves.
Here's the same scene written in Rpgscript instead of JSON:
+shakePuppet(chloe)
Chloe: "I wish I had a pencil right now..."
+movePuppet(pencil, -15, 0, ease-out, 750)
+waitMs(500)
+movePuppet(chloe, 5, 0)
Chloe: "Huh, what's that?"
+movePuppet(liam, -5, 0)
Liam: "Oops. That's probably mine. Happens a lot. My desk is basically a basket of stationery."
+shakePuppet(chloe)
Chloe: "No worries."
+movePuppet(liam, -10, 0)
+movePuppet(pencil, 0, -25)
Liam: "Want it? Here you go."
+movePuppet(liam, -10, 0, linear, 200, true)
+movePuppet(pencil, -15, 0, linear, 200, true)
+movePuppet(chloe, 10, 0, linear, 200)
+waitMs(200)
+movePuppet(liam, 10, 0)
+shakePuppet(chloe)
Chloe: "Thanks."
+movePuppet(liam, 10, 0)
+shakePuppet(liam)
Liam: "Anyway, I guess I'll see you around."
+shakePuppet(chloe)
Chloe: "Right."
+movePuppet(chloe, -5, 0, linear, 200, true)
+movePuppet(pencil, -10, 0)
By changing the syntax away from JSON, this script is now much more concise and readable. Dialogue lines are denoted by a character's name and a colon, followed by the line of dialogue, like the original script. Puppet/engine commands are prefixed with a subtle plus sign and resemble calling functions in code.
In the background the engine is still using the same data structure defined before to execute this script, but the text is first translated from Rpgscript to JSON via an interpreter.
The Rpgscript syntax allows a writer to focus on the scene itself and the puppets within it, in a way that is more traditional, instead of worrying about the rigid syntax of a format like JSON. This is great and all, but there's something about game cutscenes that I've been holistically ignoring until now that is vital to games in particular. And that's branching logic.
Step 5: Dynamic Cutscenes and Logic
The medium of video games has a wonderful advantage over traditional ways of telling a story like books or movies: it can be dynamic. The same scenes don't have to play out every time the same way, you can change the inputs such that the scene results in a different outcome. A common example of this would be the concept of a "quest" in a video game:
- The player talks with a quest-giver.
- A cutscene plays where the quest-giver details some tasks that the player must do.
- The player leaves and performs that task and returns to talk to the quest-giver again.
- A different cutscene plays, where the quest-giver establishes that the quest is complete.
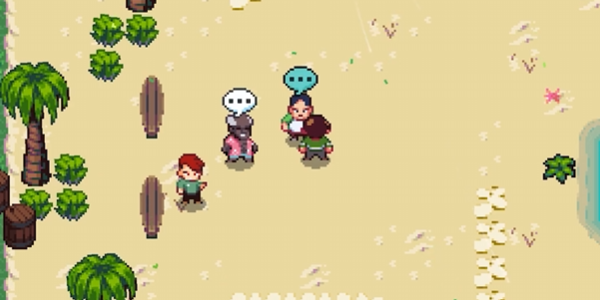
If the player talks to the quest-giver, depending on the state of the quest, they will have different dialogue. This is common in RPG games. For example, something like Golf Story.
You'll find a lot of coding advice that says something along the lines of "separate your logic from your data." The intent behind this advice is to get you to think about the difference between your code itself and what it processes. If you conflate these too much, you'll end up with a lot of interdependency between them. If the data changes too much, you'll have to also re-write your code. It feels better to write code generically enough that it can process broader amounts of data. A way to achieve this is to store your logic - the code - in a way that takes it out of the data itself. In other words, define what your program is capable of first, then add data later to test it. In general I like this way of thinking. It has led towards more maintainable, better code.
However, that poses a problem for the new requirements. It's clear that data in this regard is the script for the cutscene - the lines of dialogue and the state of the puppets. But now that also includes some logic: what scenes happen, and when? So now the logic IS the data.
To get around this, Rpgscript takes the approach of establishing that this logic is tightly related to the script, and therefore, it should be placed together. This seems directly the opposite of the advice I just postulated, but hear me out. The script itself and how it handles what runs is really a product of the cutscene itself. The game engine doesn't actually care about what it runs other than the commands it provides. Asking the engine to provide logic that the scene needs on a script to script basis feels immense, and not generic at all. And thusly wrong. To me, this justifies having something you'd never see inside a real script: if statements.
+?is(hasPencil):{
  // ...
}
+?isnot(hasPencil):{
  // ...
}
+?all(is(hasSpokenToLiam), is(hasPencil)):{
  // ...
}
These `is`, `isnot`, and `all`, and other similar statements not included, all imply some sort of variable storage. The engine has to check the value in that storage, then evaluate the expression. Rpgscript implements this as a global key -> value store which can be serialized into JSON. Global storage is known to be traditionally bad design, but there's a fine balance that Rpgscript is trying to ride between being understandable to any kind of person who reads it, and programmers who implement it. I've already introduced logic via if statements. Introducing variable scope here is... well it's scope creep.
Variables are set with an engine command and can be nested in JSON with dot syntax.
+setStorage(hasPencil, true)
+setStorage(temporary.localVariable, 1)
Step 6: Functions
Rpgscript has an established syntax for writing engine-defined commands. These are things the engine provides. In the examples I've provided, this is stuff like 'playDialogue', 'movePuppet', 'shakePuppet', and so on. But there's one additional feature it's missing that dramatically reduces the amount of repetition required to define a script.
One problem we have in the current example script is the action of the pencil and the actor holding it. To define a motion of an actor holding on to the pencil, we have to tell the engine to move both of them at the same time. If Chloe is holding the pencil, that looks like this:
  +shakePuppet(pencil, 150, true)
  +shakePuppet(chloe, 150)
Any time Chloe shakes, so indeed must the pencil. These are two lines of code that you might end up copying over and over and over again, for however long she is holding the pencil. In a movie or a play, this doesn't matter since you could just tell Chloe to hold on to the pencil while she acts. With Rpgscript, we have to be very explicit. Furthermore, what if you decide to change the shake timing from 150 ms? You'd have to find every instance you told the engine to shake Chloe with the pencil and change it to your new timing. That is not very efficient.
To solve this, Rpgscript lets you define functions and call them from within scripts. The above snippet becomes a one-liner with special syntax.
@shakePuppetWithPencil
  +shakePuppet(pencil, 150, true)
  +shakePuppet([ARG0], 150)

...

  +:shakePuppetWithPencil(chloe)
Now there's a function defined by the writer in Rpgscript as `shakePuppetWithPencil` which is invoked with "+:" syntax. The variable [ARG0] is set by passing "chloe" as the first argument. Further arguments are stored as [ARG1], [ARG2], etc. like a CPU register might work. Now either puppet, Chloe or Liam, can be shaken alongside the pencil.
The Result
I'd like to present the ultimate example. Here is an application with a fully-functional Rpgscript parser and scene runner. It runs the example cutscene one time, and depending on the state of the app, will run a second, far more silly one I've written myself. It will highlight the current line of Rpgscript that is being waited on, as well as allow you to reset and restart the cutscene at any point.
Here you can view an Rpgscript scene and even edit it yourself! Can you alter this scene to make it to your liking? Can you come up with something cool? I'd love to see it, if you do. Unlike the other examples in this post, this one isn't meant to be easily digestible from a code standpoint. It's much more complicated, split into several different files, and includes a parser, and a much-refactored version of the previous code. Of course, there's nothing stopping you from looking at the source, and I'd encourage it if you want to understand how it works.
If you don't want to play with it in this post, here's a direct link to the underlying app.